
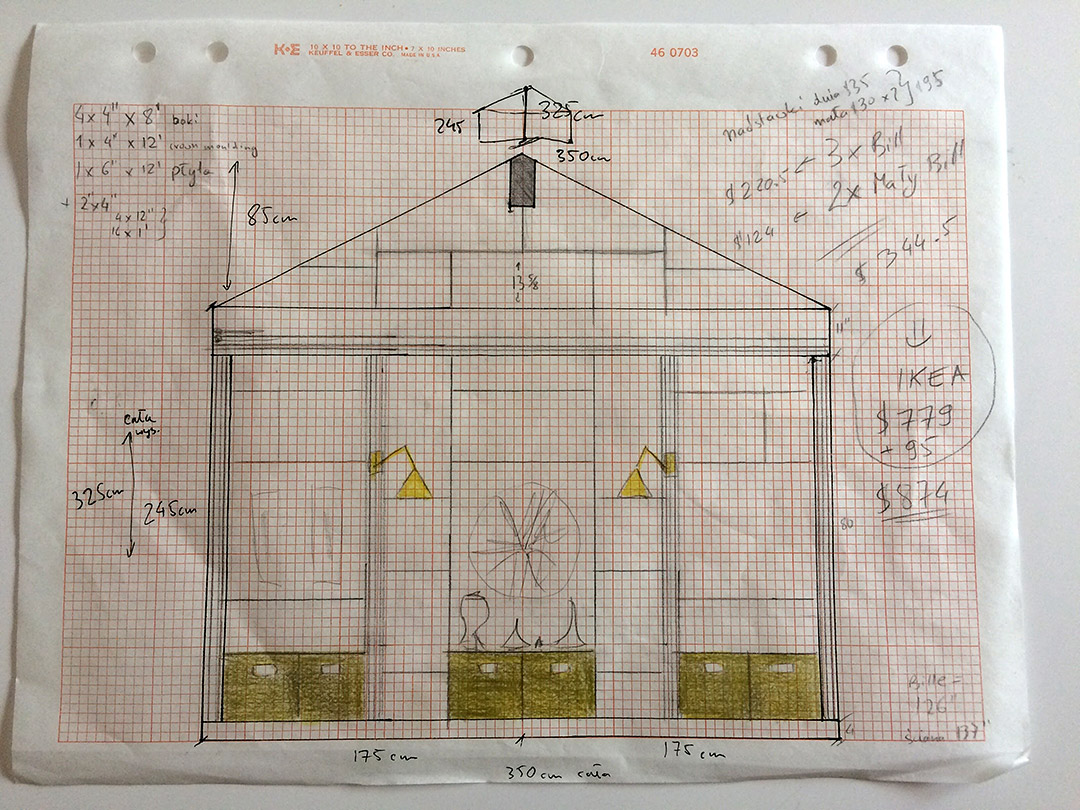
It all started with a simple sketch Piotr made to determine the proportions and layout. The space from wall to wall was just right to fit five IKEA Billy bookcases (3 of these and 2 these) with gaps wide enough to hide wiring, but also to add extra width for decorative moldings. We also decided to use three Billy extension units (here and here) and additional shelves for the top part.
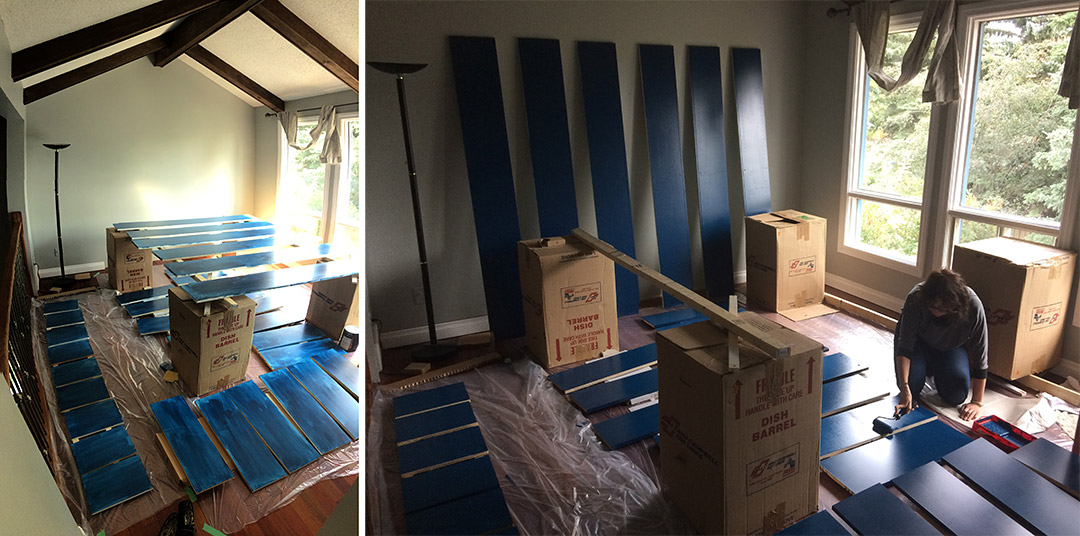
Before assembling the bookcases we painted all the parts with a semi-gloss wood and metal paint. As you can see the first coat of paint wasn’t very impressive, but the third one did the job. Believe me, it was A LOT OF painting.
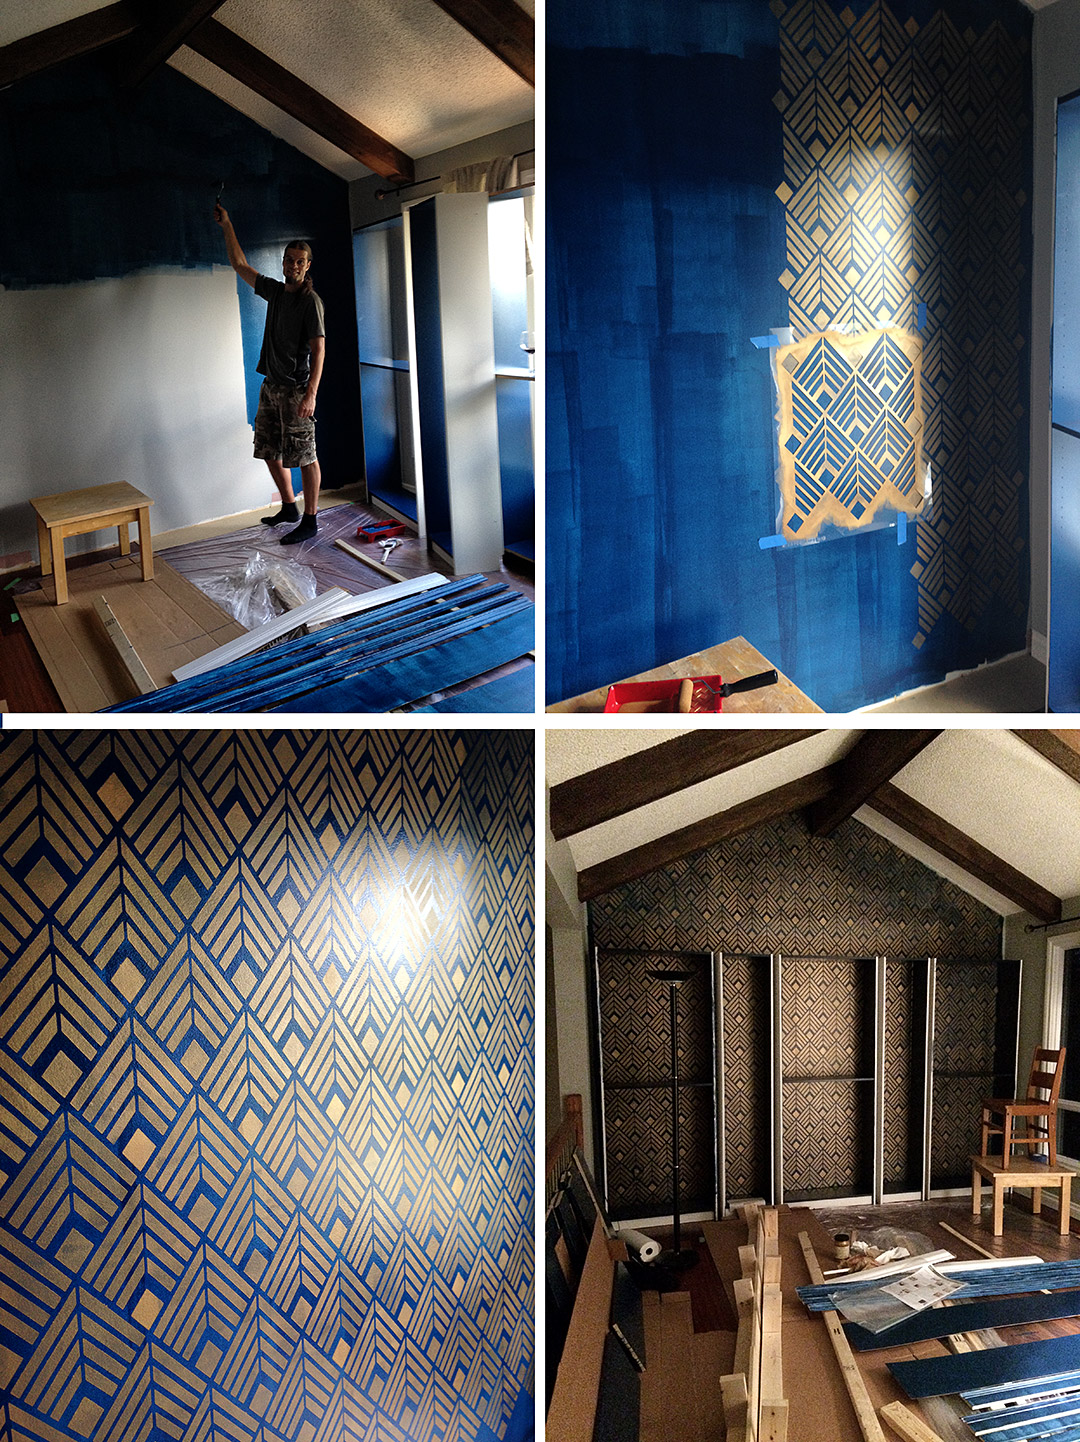
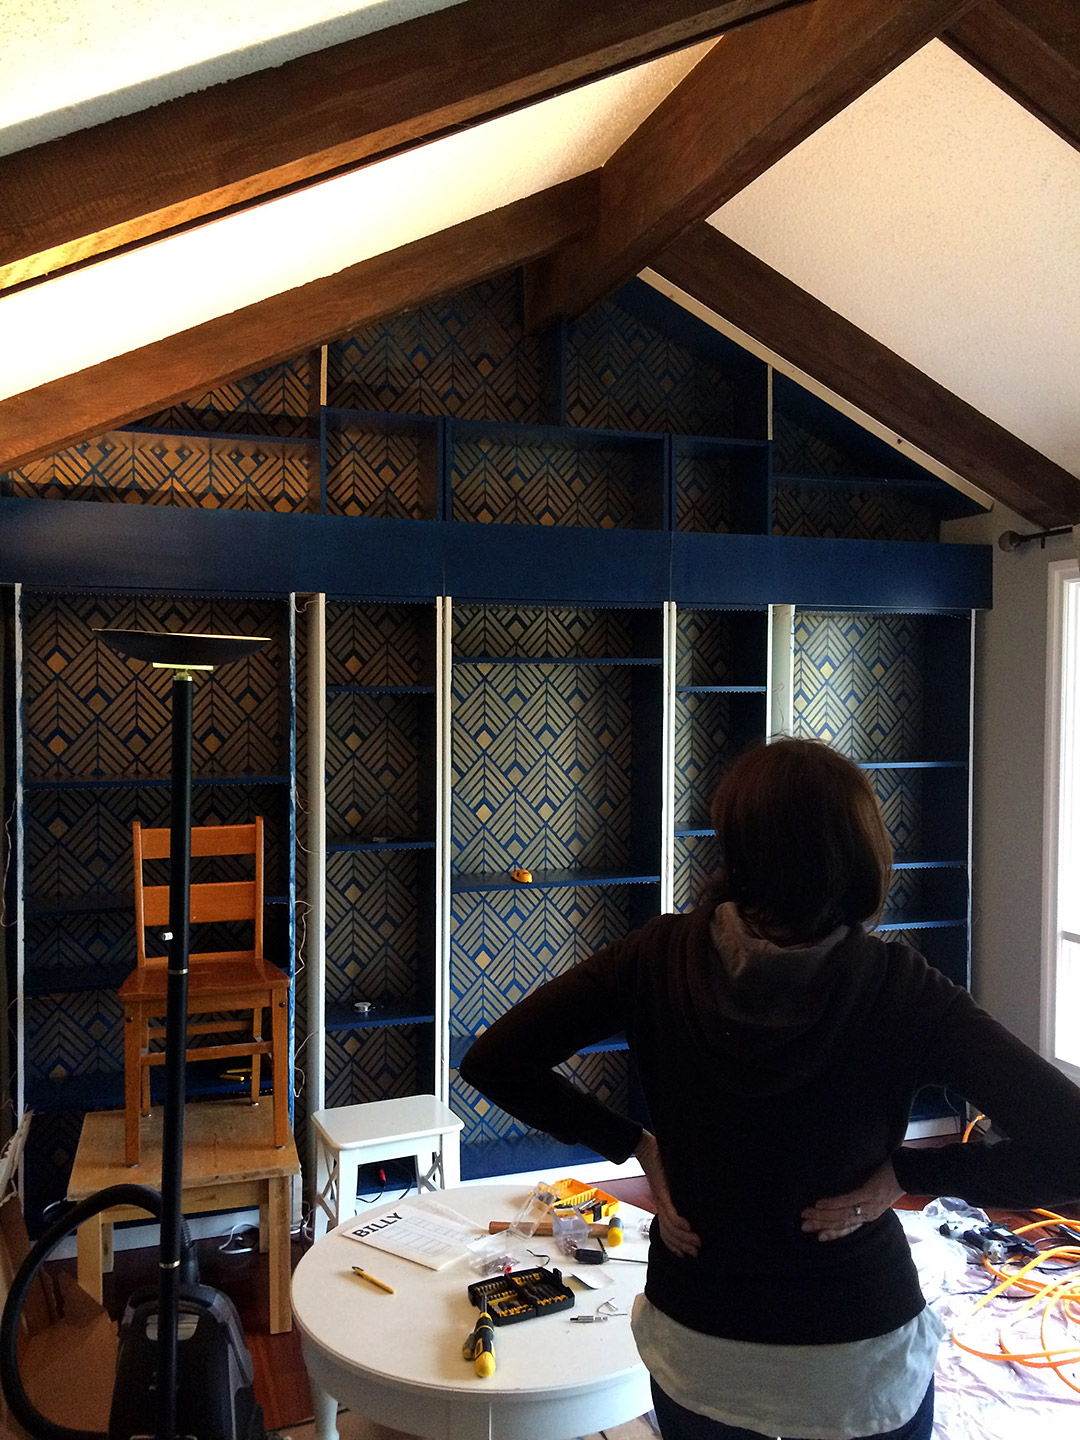
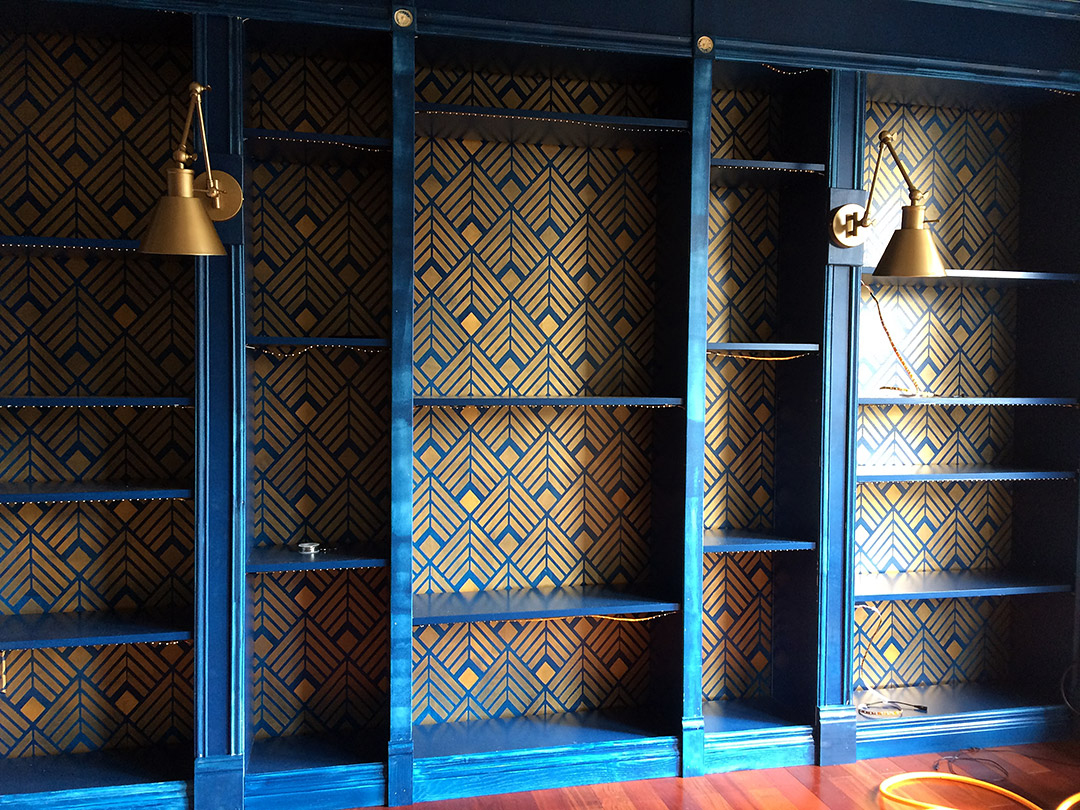
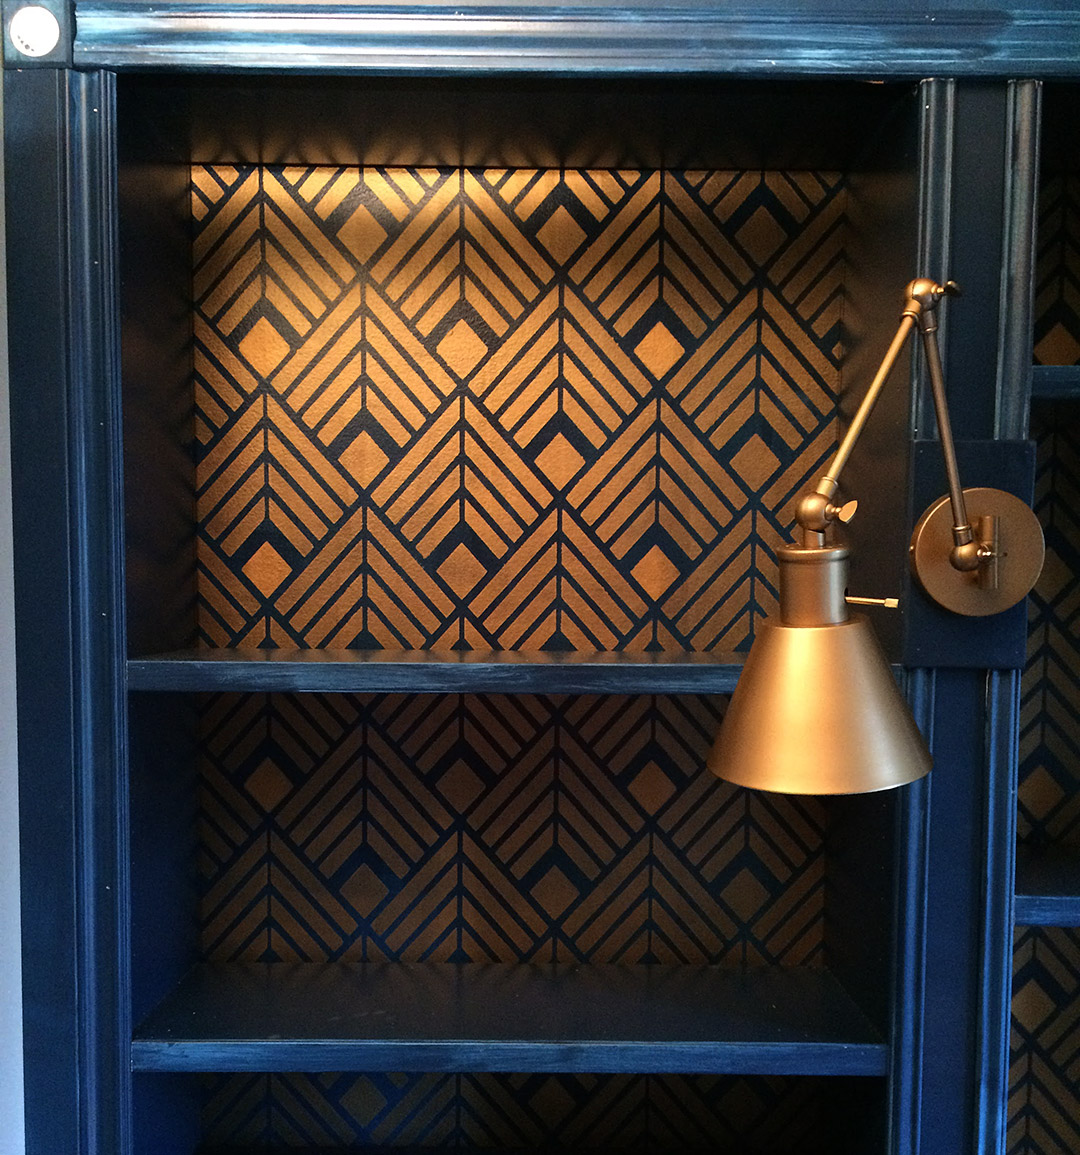
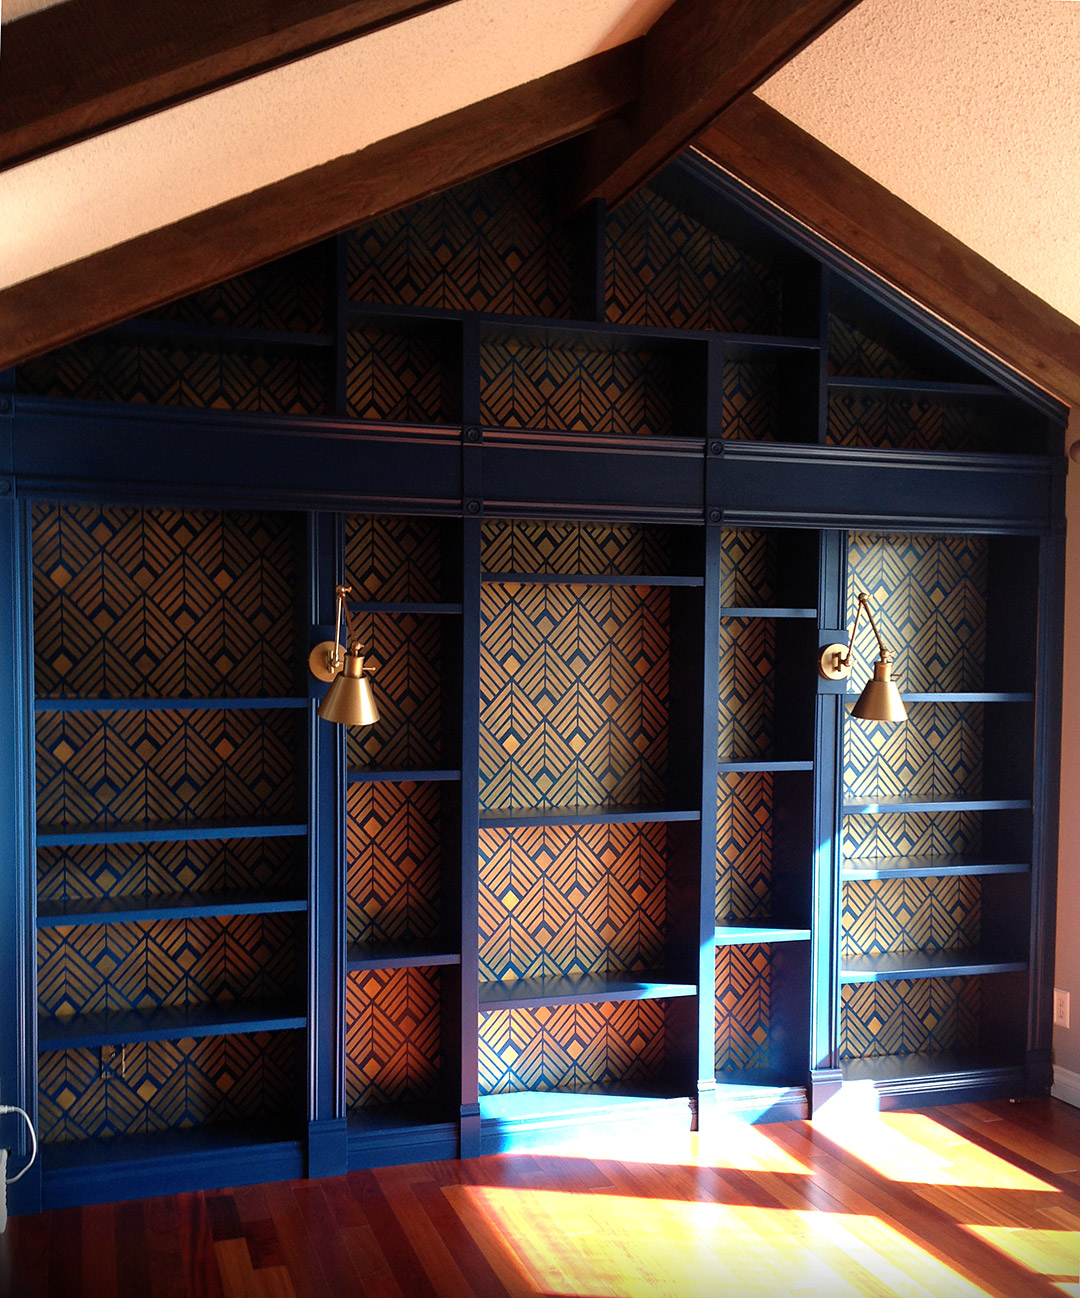
Then we prepared the wall behind the bookshelves. The initial idea was to install a gold metallic wallpaper there, but after hours of searching I came to a conclusion that all the wallpapers that I liked were simply too expensive for this budget project. So stenciling came as a solution. We fell in love with Deco Diamonds stencil the moment we saw it – not only could we have our dream pattern in metallic gold, but also use the same blue paint for the background to tie everything together. Now one remark for those who want to learn from our mistakes: if we were to do it again, we would paint the wall blue twice. We were hoping that the stencil together with objects and books on the shelves would cover the background, but well… we can see those imperfections.
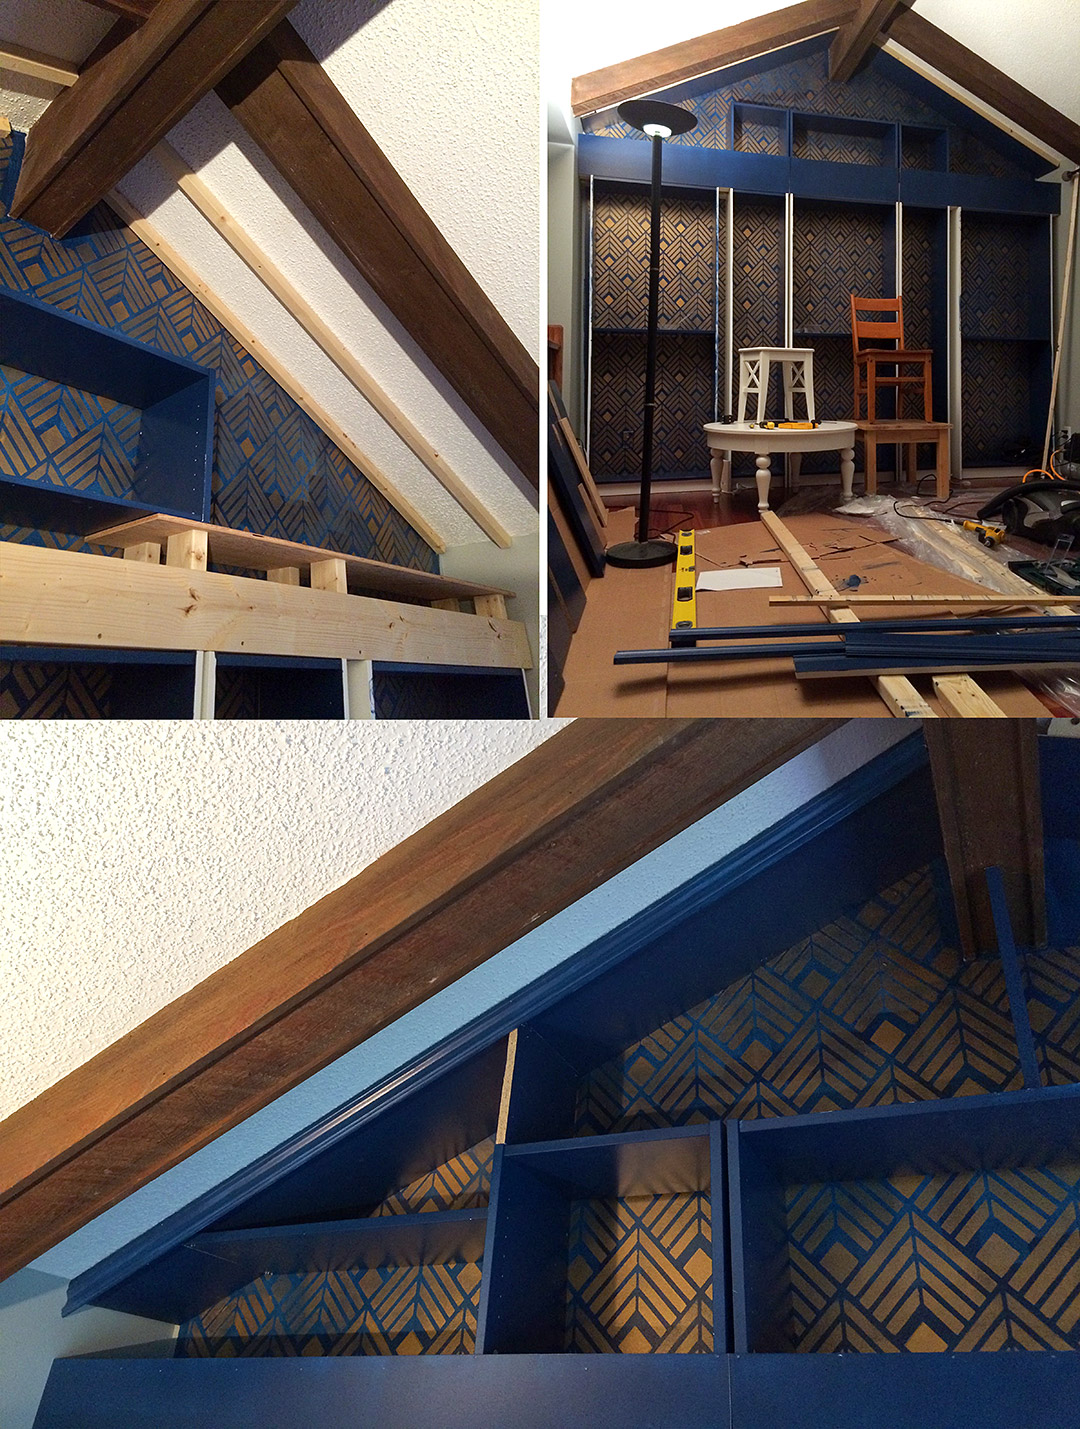
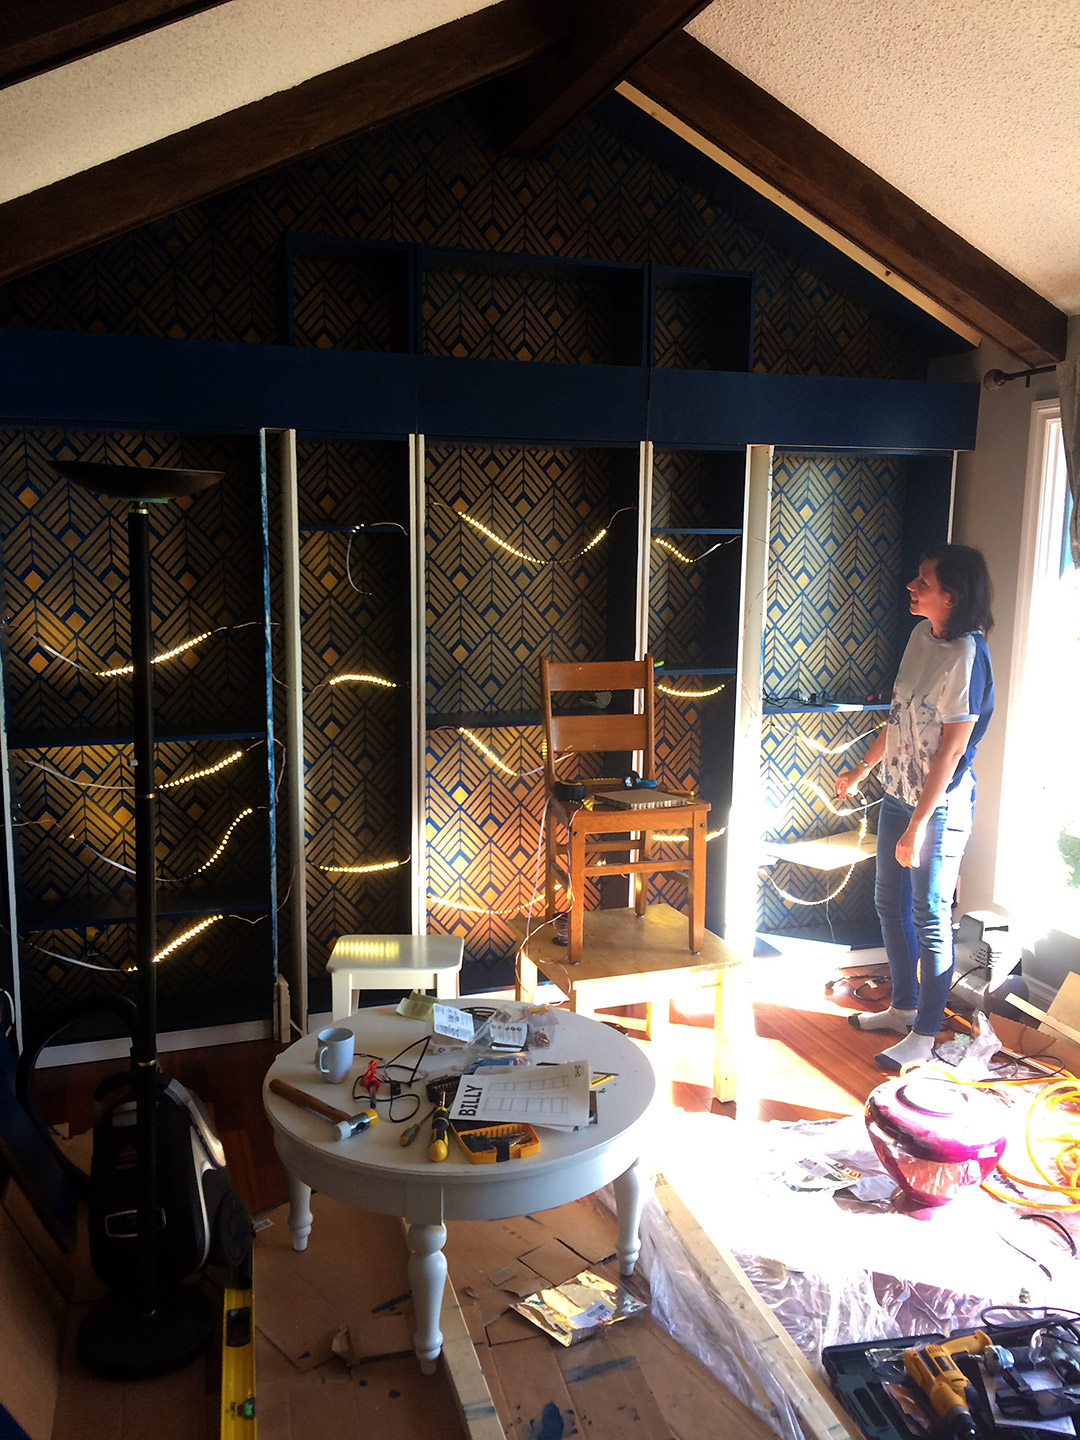
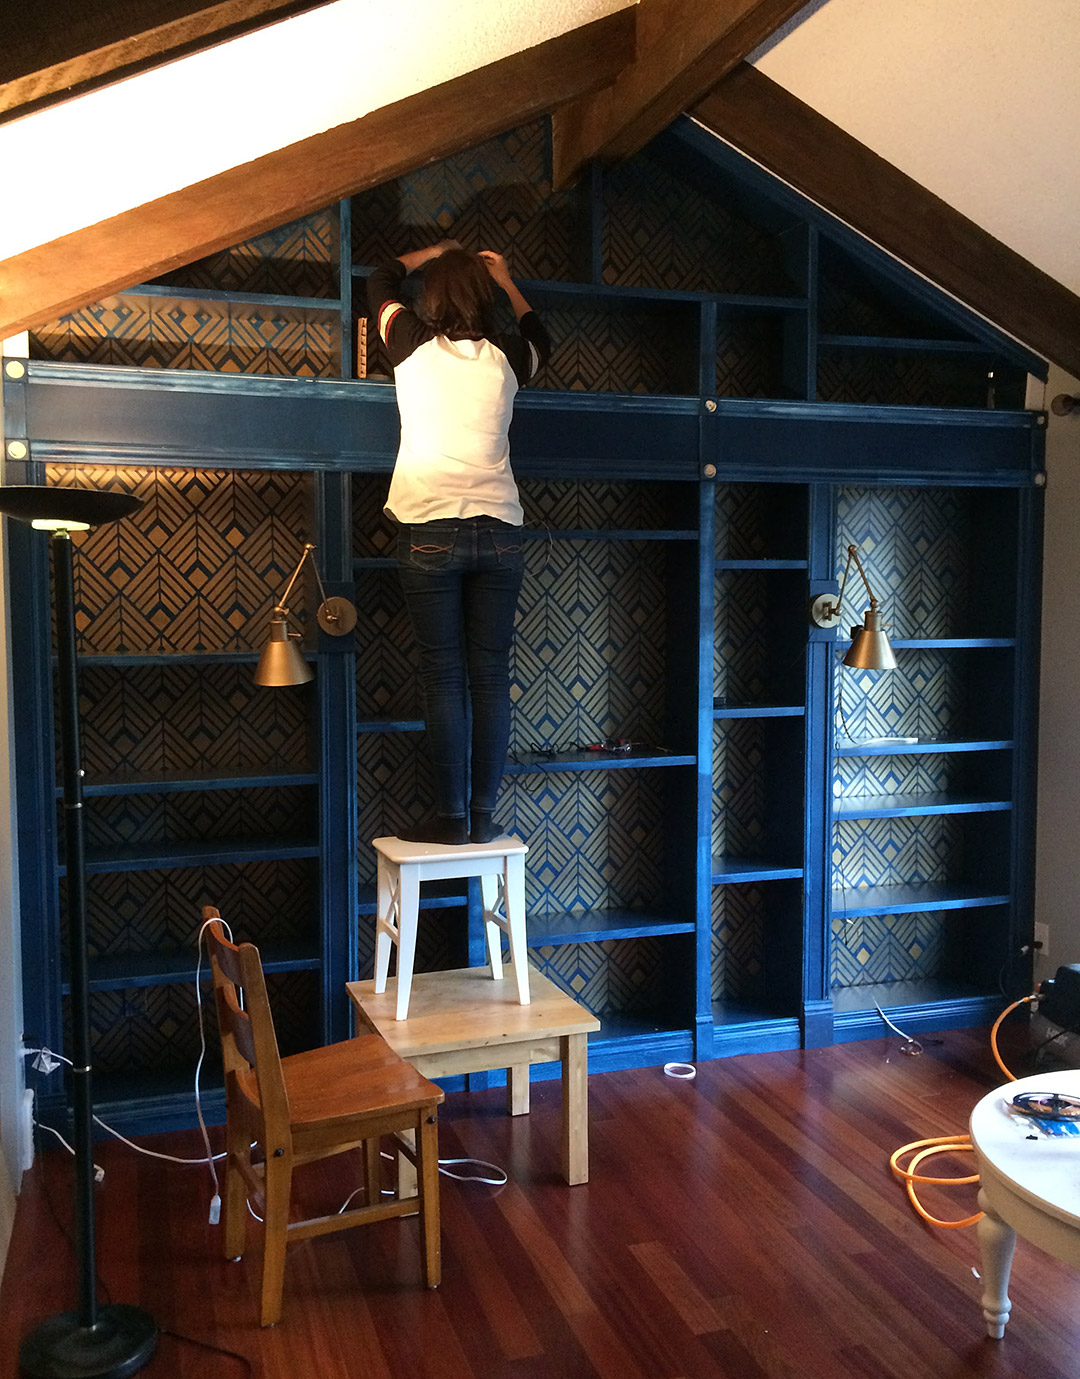
Having everything prepared it was time to put it all together. We attached the bookcases to the wall and built a frame to support the upper part and eventually a ladder. The upper part was the biggest challenge. We started with placing the extension units to align with vertical lines. We closed the bookcase from the top by attaching Billy back panels to the ceiling and adding molding for thickness. The back panels were also re-purposed to cover the horizontal partition as well as those widest gaps between the bookcases where later the sconces were installed. As we had a few spare shelves, we did some angle cutting and filled the top triangle by attaching them to the ceiling panel. The final layout turned out to be quite accurate with our initial drawing, don’t you think?
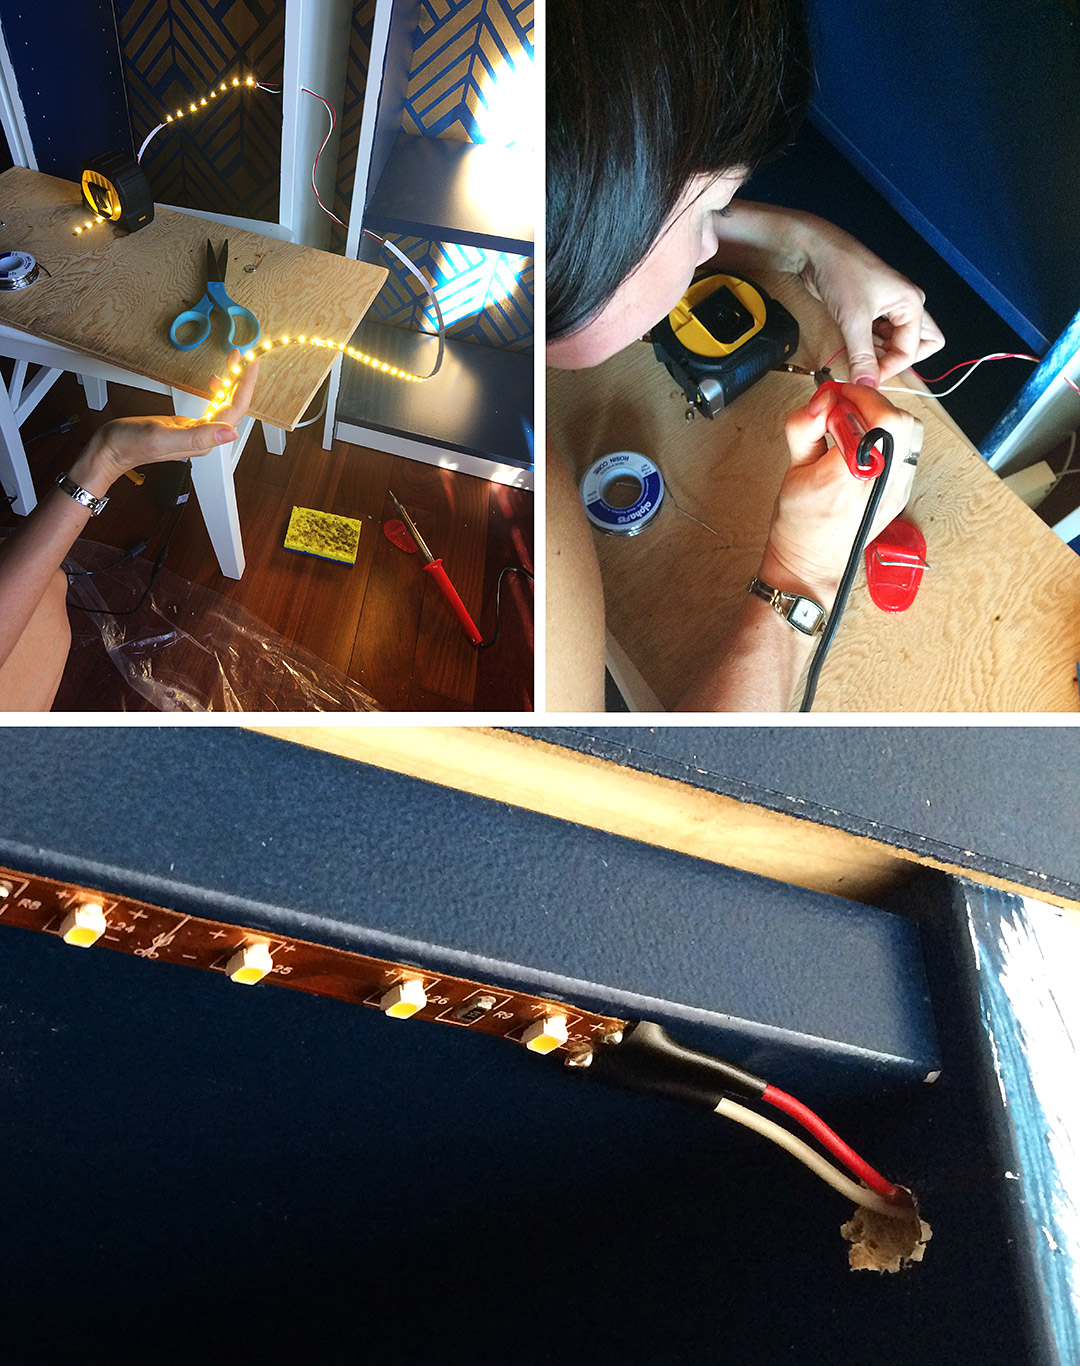
In the meantime I installed LED strips under the shelves. I had found a brilliant instructional blog post by Katy and after reading that using a soldering iron is comparable to handling a glue gun I felt quite encouraged to tackle it myself. I followed her instructions carefully and YAY! It worked! Just some additional advice from me: 1. When buying a soldering iron choose one with a pointed tip. I started with a flat one and it was pretty frustrating for someone soldering for the first time. 2. Calculate your wattage well to install appropriate transformer. Here’s a useful example how to do it.
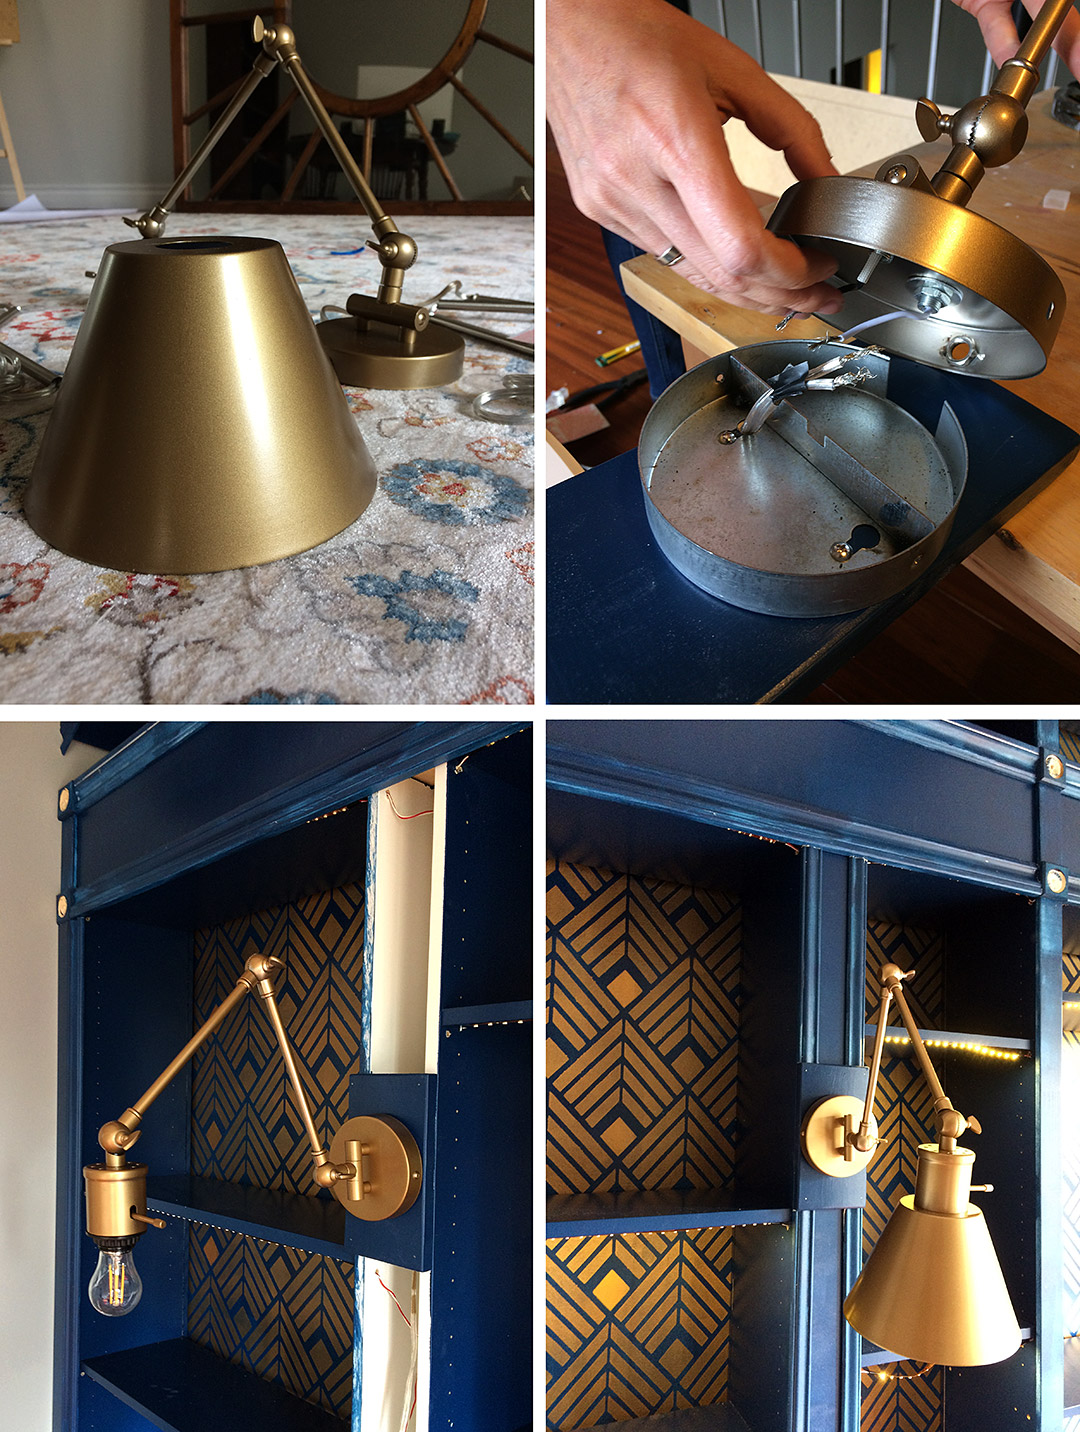
I really wanted to add some classic library charm to this project by featuring brass swing-arm sconces. And here’s what I had on my wish list: base plate small enough to fit between the bookcases, a plug and an exposed switch. Imagine my joy when I came across these in my local Home Depot! What a steal! Unfortunately they only came in nickel, but what is spray paint for?
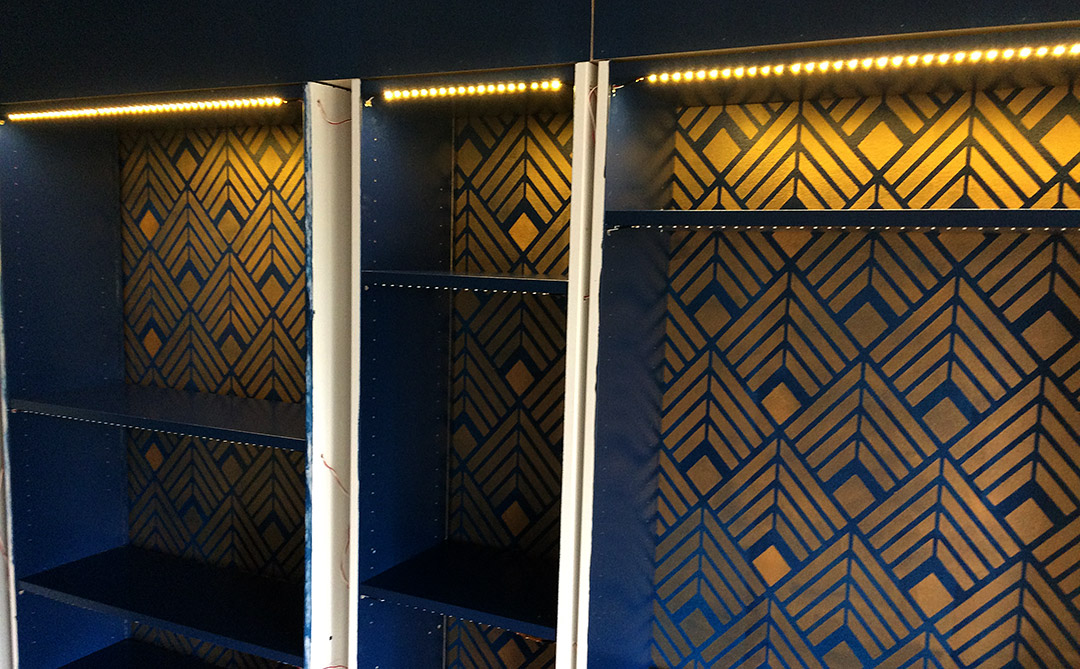
Finally, we added more moldings, baseboards and wood trim to visually thicken the shelves and hide the lights and wires. As everything was in place, covered with the final coat of paint, the excitement about finishing the project was huge. I couldn’t wait to start styling the shelves. However, the next morning brought a bitter surprise: most of the LED strips were sadly hanging loose… They just didn’t stick at all! I tried various types of double-sided tape, including some heavy duty carpet one, then hot glue, but only one thing worked. Guess what? Yes, of course Gorilla Glue! That was a huge relief, and after I managed to unglue my fingers it was decorating time! You can see the styled version of the library in my previous post. I’d be happy to hear your feedback, stories and comments.
To close this post I have a few numbers for you:
CAD 250 – Billy bookcases and extensions (but they were 30% off)
CAD 405 – moldings, trim and wood
CAD 172 – paint and stencil
CAD 376 – lighting
TOTAL COST: CAD 1,203 !!!

Please visit also this GALLERY page to see the room finished and the bookcase filled with books, art, sculptures and other beautiful things!


What color of blue did you use? This is just gorgeous!
Thank you! It’s Opera Glasses in semi-gloss by Behr.
Absolutely stunning!!!
Thank you so much!